Volley它非常适合去进行数据量不大,但通信频繁的网络操作,而对于大数据量的网络操作,比如说下载文件等,Volley的表现就会非常糟糕。 所以不建议用它去进行下载文件、加载大图的操作。有人可能会问,如果我服务器中的图片都挺大的,activity中listview要加载这些图片,是不 是不能用这个框架呢?其实这个问题本身就是错误的,你想如果你服务器的图片都是大图,你要在手机上用照片墙进行展示,下载图片都会慢的要死,这个本身就是 不可行的。所以在项目初期就应该建立好服务器端的小图,照片墙用加载小图,点击后再从网络上下载大图,这才是正确思路。这时你就可以用volley加载小 图了,如果是要加载大图,可以用别的算法,强烈建议手动完成大图清除的工作,否则很可能会出现OOM。Volley本身没有做什么回收算法,还是用*基本 的GC,实际使用中可以根据需要自定义一下。
零、准备工作
Git项目,添加为lib,申请权限
git clone https://android.googlesource.com/platform/frameworks/volley
<uses-permission android:name="android.permission.INTERNET" />
一、初始化请求对象——RequestQueue
public class MyApplication extends Application {

    public static RequestQueue requestQueue;

    @Override
    public void onCreate() {
        super.onCreate();
        // 不必为每一次HTTP请求都创建一个RequestQueue对象,推荐在application中初始化
        requestQueue = Volley.newRequestQueue(this);
    }
}
既然是Http操作,自然有请求和响应,RequestQueue是一个请求队列 对象,它可以缓存所有的HTTP请求,然后按照一定的算法并发地发出这些请求。RequestQueue内部的设计就是非常合适高并发的,因此我们不必为 每一次HTTP请求都创建一个RequestQueue对象,这是非常浪费资源的。所以在这里我建立了一个application,然后用单例模式定义了 这个对象。当然,你可以选择在一个activity中定义一个RequestQueue对象,但这样可能会比较麻烦,而且还可能出现请求队列包含 activity强引用的问题,因此我还是推荐在application中定义。
二、使用StringRequest接收String类型的响应
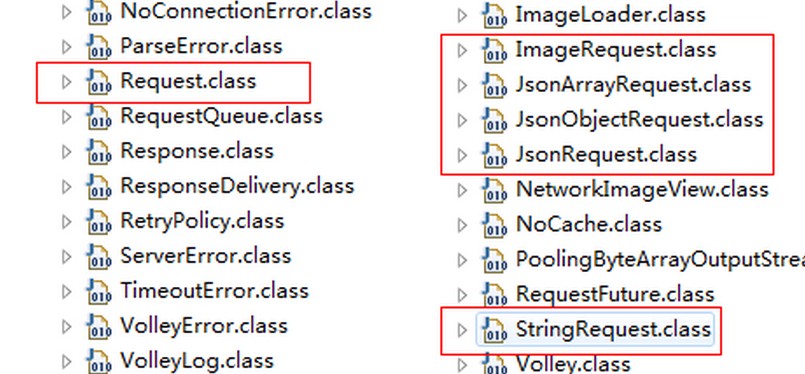
前 面定义了请求对象,那么自然就有接收响应的对象了,这个框架中有多个响应对象,像StringRequest接受到的响应就是string类型 的;JsonRequest接收的响应就是Json类型对象。其实它们都是继承自Request<T>,然后根据不同的响应数据来进行特殊的 处理。
2.1 初始化
**
     * Creates a new request with the given method.
     *
     * @param method the request {@link Method} to use
     * @param url URL to fetch the string at
     * @param listener Listener to receive the String response
     * @param errorListener Error listener, or null to ignore errors
     */
    public StringRequest(int method, String url, Listener<String> listener, ErrorListener errorListener)
    /**
     * Creates a new GET request.
     *
     * @param url URL to fetch the string at
     * @param listener Listener to receive the String response
     * @param errorListener Error listener, or null to ignore errors
     */
    public StringRequest(String url, Listener<String> listener, ErrorListener errorListener) {
        this(Method.GET, url, listener, errorListener);
    }
这就是StringRequest的两个构造函数,不同之处是一个传入了一个method的参数,一个没有。其实看上面的源码就知道,如果你不传入method,默认会调用GET方式进行请求。当你传入了Method.POST就会用post来请求。
【参数解释】
url:请求的地址
listener:响应成功的监听器
errorListener:出错时的监听器
StringRequest getStringRequest = new StringRequest("http://www.baidu.com", new ResponseListener(), new ResponseErrorListener());
StringRequest postStringRequest = new StringRequest(Method.POST, "http://www.baidu.com", new ResponseListener(),null);
2.2 配置监听器
/**
     * @author:Jack Tony
     * @description  :设置响应结果监听器,因为用的是StringRequest,所以这里的结果我定义为string类型
     * @date  :2015年1月24日
     */
    private class ResponseListener implements Response.Listener<String>{

        @Override
        public void onResponse(String response) {
            // TODO 自动生成的方法存根
             Log.d("TAG", "-------------\n" + response);
        }
    }


    /**
     * @author:Jack Tony
     * @description  :访问出错时触发的监听器
     * @date  :2015年1月28日
     */
    private class ResponseErrorListener implements Response.ErrorListener{

        @Override
        public void onErrorResponse(VolleyError error) {
            // TODO 自动生成的方法存根
             Log.e("TAG", error.getMessage(), error);
        }

    }
这两个监听器没啥可说的,因为是StringRequest调用的,所以成功时触发的监听器中得到的response就是String类型。如果访问出错,那么就打印出错信息。
2.3 执行GET请求
现在我们有了请求对象和响应对象,外加处理响应结果的监听器,那么就执行*后一步——发送请求。发送请求很简单,将响应对象添加到请求队列即可。
mQueue.add(getStringRequest);
完整代码:
        RequestQueue mQueue = MyApplication.requestQueue;
        StringRequest getStringRequest = new StringRequest("http://www.baidu.com", new ResponseListener(), new ResponseErrorListener());
        mQueue.add(getStringRequest);
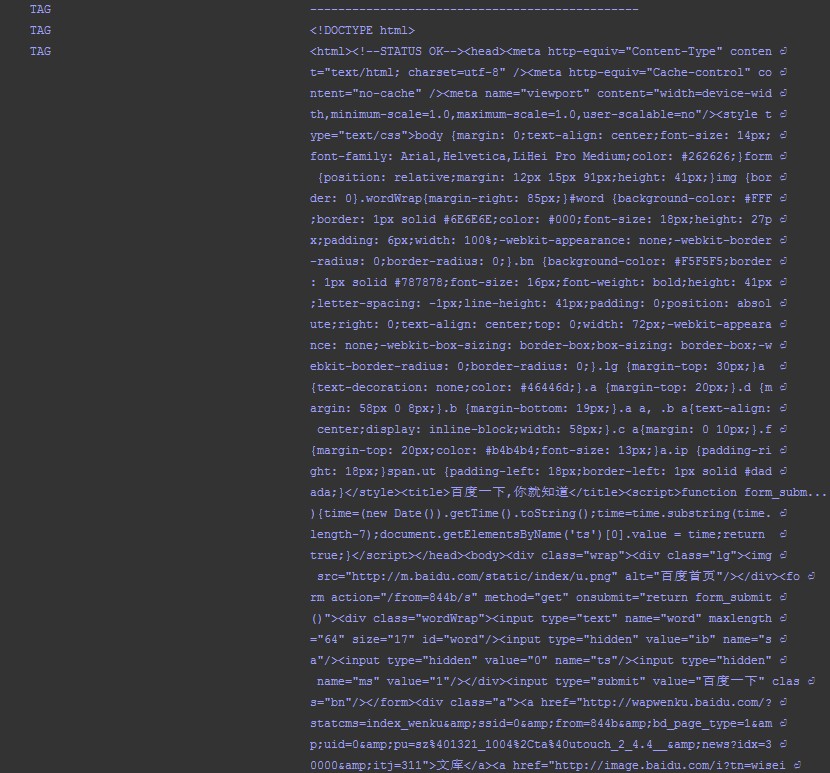
通过简单的add()方法就直接发送了请求,如果服务器响应了请求就会触发我们的结果监听器,然后被打印出啦。现在请求的是百度,所以得到了网页的源码:
2.4 执行POST请求
POST和GET一样,仅仅是传入的方法不同。但一般我们的post都是要带一些参数的,volley没有提供附加参数的方法,所以我们必须要在StringRequest的匿名类中重写getParams()方法:
StringRequest stringRequest = new StringRequest(Method.POST, url,  listener, errorListener) {
    @Override
    protected Map<String, String> getParams() throws AuthFailureError {
        Map<String, String> map = new HashMap<String, String>();
        map.put("params1", "value1");
        map.put("params2", "value2");
        return map;
    }
};
这 样就传入了value1和value2两个参数了。现在可能有人会问为啥这个框架不提供这个传参的方法,还非得让我们重写。我个人觉得这个框架本身的目的 就是执行频繁的网络请求,比如下载图片,解析json数据什么的,用GET就能很好的实现了,所以就没有提供传参的POST方法。为了简单起见,我重写了 Request类中的getParams(),添加了传参的方法,以后通过setParams()就可以传参数了。
重写的代码块:
    Map<String, String> mParams = null;

    /**
     * Returns a Map of parameters to be used for a POST or PUT request.  Can throw
     * {@link AuthFailureError} as authentication may be required to provide these values.
     *
     * <p>Note that you can directly override {@link #getBody()} for custom data.</p>
     *
     * @throws AuthFailureError in the event of auth failure
     */
    protected Map<String, String> getParams() throws AuthFailureError {
        return mParams;
    }

    public void setParams(Map<String, String> params){
        mParams = params;
    }
完整代码:
/*
 * Copyright (C) 2011 The Android Open Source Project
 *
 * Licensed under the Apache License, Version 2.0 (the "License");
 * you may not use this file except in compliance with the License.
 * You may obtain a copy of the License at
 *
 *      http://www.apache.org/licenses/LICENSE-2.0
 *
 * Unless required by applicable law or agreed to in writing, software
 * distributed under the License is distributed on an "AS IS" BASIS,
 * WITHOUT WARRANTIES OR CONDITIONS OF ANY KIND, either express or implied.
 * See the License for the specific language governing permissions and
 * limitations under the License.
 */

package com.android.volley;

import java.io.UnsupportedEncodingException;
import java.net.URLEncoder;
import java.util.Collections;
import java.util.Map;

import android.net.TrafficStats;
import android.net.Uri;
import android.os.Handler;
import android.os.Looper;
import android.os.SystemClock;
import android.text.TextUtils;

import com.android.volley.VolleyLog.MarkerLog;

/**
 * Base class for all network requests.
 *
 * @param <T> The type of parsed response this request expects.
 */
public abstract class Request<T> implements Comparable<Request<T>> {

    /**
     * Default encoding for POST or PUT parameters. See {@link #getParamsEncoding()}.
     */
    private static final String DEFAULT_PARAMS_ENCODING = "UTF-8";

    /**
     * Supported request methods.
     */
    public interface Method {
        int DEPRECATED_GET_OR_POST = -1;
        int GET = 0;
        int POST = 1;
        int PUT = 2;
        int DELETE = 3;
        int HEAD = 4;
        int OPTIONS = 5;
        int TRACE = 6;
        int PATCH = 7;
    }

    /** An event log tracing the lifetime of this request; for debugging. */
    private final MarkerLog mEventLog = MarkerLog.ENABLED ? new MarkerLog() : null;

    /**
     * Request method of this request.  Currently supports GET, POST, PUT, DELETE, HEAD, OPTIONS,
     * TRACE, and PATCH.
     */
    private final int mMethod;

    /** URL of this request. */
    private final String mUrl;

    /** Default tag for {@link TrafficStats}. */
    private final int mDefaultTrafficStatsTag;

    /** Listener interface for errors. */
    private final Response.ErrorListener mErrorListener;

    /** Sequence number of this request, used to enforce FIFO ordering. */
    private Integer mSequence;

    /** The request queue this request is associated with. */
    private RequestQueue mRequestQueue;

    /** Whether or not responses to this request should be cached. */
    private boolean mShouldCache = true;

    /** Whether or not this request has been canceled. */
    private boolean mCanceled = false;

    /** Whether or not a response has been delivered for this request yet. */
    private boolean mResponseDelivered = false;

    // A cheap variant of request tracing used to dump slow requests.
    private long mRequestBirthTime = 0;

    /** Threshold at which we should log the request (even when debug logging is not enabled). */
    private static final long SLOW_REQUEST_THRESHOLD_MS = 3000;

    /** The retry policy for this request. */
    private RetryPolicy mRetryPolicy;

    /**
     * When a request can be retrieved from cache but must be refreshed from
     * the network, the cache entry will be stored here so that in the event of
     * a "Not Modified" response, we can be sure it hasn't been evicted from cache.
     */
    private Cache.Entry mCacheEntry = null;

    /** An opaque token tagging this request; used for bulk cancellation. */
    private Object mTag;

    /**
     * Creates a new request with the given URL and error listener.  Note that
     * the normal response listener is not provided here as delivery of responses
     * is provided by subclasses, who have a better idea of how to deliver an
     * already-parsed response.
     *
     * @deprecated Use {@link #Request(int, String, com.android.volley.Response.ErrorListener)}.
     */
    @Deprecated
    public Request(String url, Response.ErrorListener listener) {
        this(Method.DEPRECATED_GET_OR_POST, url, listener);
    }

    /**
     * Creates a new request with the given method (one of the values from {@link Method}),
     * URL, and error listener.  Note that the normal response listener is not provided here as
     * delivery of responses is provided by subclasses, who have a better idea of how to deliver
     * an already-parsed response.
     */
    public Request(int method, String url, Response.ErrorListener listener) {
        mMethod = method;
        mUrl = url;
        mErrorListener = listener;
        setRetryPolicy(new DefaultRetryPolicy());

        mDefaultTrafficStatsTag = findDefaultTrafficStatsTag(url);
    }

    /**
     * Return the method for this request.  Can be one of the values in {@link Method}.
     */
    public int getMethod() {
        return mMethod;
    }

    /**
     * Set a tag on this request. Can be used to cancel all requests with this
     * tag by {@link RequestQueue#cancelAll(Object)}.
     *
     * @return This Request object to allow for chaining.
     */
    public Request<?> setTag(Object tag) {
        mTag = tag;
        return this;
    }

    /**
     * Returns this request's tag.
     * @see Request#setTag(Object)
     */
    public Object getTag() {
        return mTag;
    }

    /**
     * @return this request's {@link com.android.volley.Response.ErrorListener}.
     */
    public Response.ErrorListener getErrorListener() {
        return mErrorListener;
    }

    /**
     * @return A tag for use with {@link TrafficStats#setThreadStatsTag(int)}
     */
    public int getTrafficStatsTag() {
        return mDefaultTrafficStatsTag;
    }

    /**
     * @return The hashcode of the URL's host component, or 0 if there is none.
     */
    private static int findDefaultTrafficStatsTag(String url) {
        if (!TextUtils.isEmpty(url)) {
            Uri uri = Uri.parse(url);
            if (uri != null) {
                String host = uri.getHost();
                if (host != null) {
                    return host.hashCode();
                }
            }
        }
        return 0;
    }

    /**
     * Sets the retry policy for this request.
     *
     * @return This Request object to allow for chaining.
     */
    public Request<?> setRetryPolicy(RetryPolicy retryPolicy) {
        mRetryPolicy = retryPolicy;
        return this;
    }

    /**
     * Adds an event to this request's event log; for debugging.
     */
    public void addMarker(String tag) {
        if (MarkerLog.ENABLED) {
            mEventLog.add(tag, Thread.currentThread().getId());
        } else if (mRequestBirthTime == 0) {
            mRequestBirthTime = SystemClock.elapsedRealtime();
        }
    }

    /**
     * Notifies the request queue that this request has finished (successfully or with error).
     *
     * <p>Also dumps all events from this request's event log; for debugging.</p>
     */
    void finish(final String tag) {
        if (mRequestQueue != null) {
            mRequestQueue.finish(this);
        }
        if (MarkerLog.ENABLED) {
            final long threadId = Thread.currentThread().getId();
            if (Looper.myLooper() != Looper.getMainLooper()) {
                // If we finish marking off of the main thread, we need to
                // actually do it on the main thread to ensure correct ordering.
                Handler mainThread = new Handler(Looper.getMainLooper());
                mainThread.post(new Runnable() {
                    @Override
                    public void run() {
                        mEventLog.add(tag, threadId);
                        mEventLog.finish(this.toString());
                    }
                });
                return;
            }

            mEventLog.add(tag, threadId);
            mEventLog.finish(this.toString());
        } else {
            long requestTime = SystemClock.elapsedRealtime() - mRequestBirthTime;
            if (requestTime >= SLOW_REQUEST_THRESHOLD_MS) {
                VolleyLog.d("%d ms: %s", requestTime, this.toString());
            }
        }
    }

    /**
     * Associates this request with the given queue. The request queue will be notified when this
     * request has finished.
     *
     * @return This Request object to allow for chaining.
     */
    public Request<?> setRequestQueue(RequestQueue requestQueue) {
        mRequestQueue = requestQueue;
        return this;
    }

    /**
     * Sets the sequence number of this request.  Used by {@link RequestQueue}.
     *
     * @return This Request object to allow for chaining.
     */
    public final Request<?> setSequence(int sequence) {
        mSequence = sequence;
        return this;
    }

    /**
     * Returns the sequence number of this request.
     */
    public final int getSequence() {
        if (mSequence == null) {
            throw new IllegalStateException("getSequence called before setSequence");
        }
        return mSequence;
    }

    /**
     * Returns the URL of this request.
     */
    public String getUrl() {
        return mUrl;
    }

    /**
     * Returns the cache key for this request.  By default, this is the URL.
     */
    public String getCacheKey() {
        return getUrl();
    }

    /**
     * Annotates this request with an entry retrieved for it from cache.
     * Used for cache coherency support.
     *
     * @return This Request object to allow for chaining.
     */
    public Request<?> setCacheEntry(Cache.Entry entry) {
        mCacheEntry = entry;
        return this;
    }

    /**
     * Returns the annotated cache entry, or null if there isn't one.
     */
    public Cache.Entry getCacheEntry() {
        return mCacheEntry;
    }

    /**
     * Mark this request as canceled.  No callback will be delivered.
     */
    public void cancel() {
        mCanceled = true;
    }

    /**
     * Returns true if this request has been canceled.
     */
    public boolean isCanceled() {
        return mCanceled;
    }

    /**
     * Returns a list of extra HTTP headers to go along with this request. Can
     * throw {@link AuthFailureError} as authentication may be required to
     * provide these values.
     * @throws AuthFailureError In the event of auth failure
     */
    public Map<String, String> getHeaders() throws AuthFailureError {
        return Collections.emptyMap();
    }

    /**
     * Returns a Map of POST parameters to be used for this request, or null if
     * a simple GET should be used.  Can throw {@link AuthFailureError} as
     * authentication may be required to provide these values.
     *
     * <p>Note that only one of getPostParams() and getPostBody() can return a non-null
     * value.</p>
     * @throws AuthFailureError In the event of auth failure
     *
     * @deprecated Use {@link #getParams()} instead.
     */
    @Deprecated
    protected Map<String, String> getPostParams() throws AuthFailureError {
        return getParams();
    }

    /**
     * Returns which encoding should be used when converting POST parameters returned by
     * {@link #getPostParams()} into a raw POST body.
     *
     * <p>This controls both encodings:
     * <ol>
     *     <li>The string encoding used when converting parameter names and values into bytes prior
     *         to URL encoding them.</li>
     *     <li>The string encoding used when converting the URL encoded parameters into a raw
     *         byte array.</li>
     * </ol>
     *
     * @deprecated Use {@link #getParamsEncoding()} instead.
     */
    @Deprecated
    protected String getPostParamsEncoding() {
        return getParamsEncoding();
    }

    /**
     * @deprecated Use {@link #getBodyContentType()} instead.
     */
    @Deprecated
    public String getPostBodyContentType() {
        return getBodyContentType();
    }

    /**
     * Returns the raw POST body to be sent.
     *
     * @throws AuthFailureError In the event of auth failure
     *
     * @deprecated Use {@link #getBody()} instead.
     */
    @Deprecated
    public byte[] getPostBody() throws AuthFailureError {
        // Note: For compatibility with legacy clients of volley, this implementation must remain
        // here instead of simply calling the getBody() function because this function must
        // call getPostParams() and getPostParamsEncoding() since legacy clients would have
        // overridden these two member functions for POST requests.
        Map<String, String> postParams = getPostParams();
        if (postParams != null && postParams.size() > 0) {
            return encodeParameters(postParams, getPostParamsEncoding());
        }
        return null;
    }

    Map<String, String> mParams = null;

    /**
     * Returns a Map of parameters to be used for a POST or PUT request.  Can throw
     * {@link AuthFailureError} as authentication may be required to provide these values.
     *
     * <p>Note that you can directly override {@link #getBody()} for custom data.</p>
     *
     * @throws AuthFailureError in the event of auth failure
     */
    protected Map<String, String> getParams() throws AuthFailureError {
        return mParams;
    }

    public void setParams(Map<String, String> params){
        mParams = params;
    }

    /**
     * Returns which encoding should be used when converting POST or PUT parameters returned by
     * {@link #getParams()} into a raw POST or PUT body.
     *
     * <p>This controls both encodings:
     * <ol>
     *     <li>The string encoding used when converting parameter names and values into bytes prior
     *         to URL encoding them.</li>
     *     <li>The string encoding used when converting the URL encoded parameters into a raw
     *         byte array.</li>
     * </ol>
     */
    protected String getParamsEncoding() {
        return DEFAULT_PARAMS_ENCODING;
    }

    /**
     * Returns the content type of the POST or PUT body.
     */
    public String getBodyContentType() {
        return "application/x-www-form-urlencoded; charset=" + getParamsEncoding();
    }

    /**
     * Returns the raw POST or PUT body to be sent.
     *
     * <p>By default, the body consists of the request parameters in
     * application/x-www-form-urlencoded format. When overriding this method, consider overriding
     * {@link #getBodyContentType()} as well to match the new body format.
     *
     * @throws AuthFailureError in the event of auth failure
     */
    public byte[] getBody() throws AuthFailureError {
        Map<String, String> params = getParams();
        if (params != null && params.size() > 0) {
            return encodeParameters(params, getParamsEncoding());
        }
        return null;
    }

    /**
     * Converts <code>params</code> into an application/x-www-form-urlencoded encoded string.
     */
    private byte[] encodeParameters(Map<String, String> params, String paramsEncoding) {
        StringBuilder encodedParams = new StringBuilder();
        try {
            for (Map.Entry<String, String> entry : params.entrySet()) {
                encodedParams.append(URLEncoder.encode(entry.getKey(), paramsEncoding));
                encodedParams.append('=');
                encodedParams.append(URLEncoder.encode(entry.getValue(), paramsEncoding));
                encodedParams.append('&');
            }
            return encodedParams.toString().getBytes(paramsEncoding);
        } catch (UnsupportedEncodingException uee) {
            throw new RuntimeException("Encoding not supported: " + paramsEncoding, uee);
        }
    }

    /**
     * Set whether or not responses to this request should be cached.
     *
     * @return This Request object to allow for chaining.
     */
    public final Request<?> setShouldCache(boolean shouldCache) {
        mShouldCache = shouldCache;
        return this;
    }

    /**
     * Returns true if responses to this request should be cached.
     */
    public final boolean shouldCache() {
        return mShouldCache;
    }

    /**
     * Priority values.  Requests will be processed from higher priorities to
     * lower priorities, in FIFO order.
     */
    public enum Priority {
        LOW,
        NORMAL,
        HIGH,
        IMMEDIATE
    }

    /**
     * Returns the {@link Priority} of this request; {@link Priority#NORMAL} by default.
     */
    public Priority getPriority() {
        return Priority.NORMAL;
    }

    /**
     * Returns the socket timeout in milliseconds per retry attempt. (This value can be changed
     * per retry attempt if a backoff is specified via backoffTimeout()). If there are no retry
     * attempts remaining, this will cause delivery of a {@link TimeoutError} error.
     */
    public final int getTimeoutMs() {
        return mRetryPolicy.getCurrentTimeout();
    }

    /**
     * Returns the retry policy that should be used  for this request.
     */
    public RetryPolicy getRetryPolicy() {
        return mRetryPolicy;
    }

    /**
     * Mark this request as having a response delivered on it.  This can be used
     * later in the request's lifetime for suppressing identical responses.
     */
    public void markDelivered() {
        mResponseDelivered = true;
    }

    /**
     * Returns true if this request has had a response delivered for it.
     */
    public boolean hasHadResponseDelivered() {
        return mResponseDelivered;
    }

    /**
     * Subclasses must implement this to parse the raw network response
     * and return an appropriate response type. This method will be
     * called from a worker thread.  The response will not be delivered
     * if you return null.
     * @param response Response from the network
     * @return The parsed response, or null in the case of an error
     */
    abstract protected Response<T> parseNetworkResponse(NetworkResponse response);

    /**
     * Subclasses can override this method to parse 'networkError' and return a more specific error.
     *
     * <p>The default implementation just returns the passed 'networkError'.</p>
     *
     * @param volleyError the error retrieved from the network
     * @return an NetworkError augmented with additional information
     */
    protected VolleyError parseNetworkError(VolleyError volleyError) {
        return volleyError;
    }

    /**
     * Subclasses must implement this to perform delivery of the parsed
     * response to their listeners.  The given response is guaranteed to
     * be non-null; responses that fail to parse are not delivered.
     * @param response The parsed response returned by
     * {@link #parseNetworkResponse(NetworkResponse)}
     */
    abstract protected void deliverResponse(T response);

    /**
     * Delivers error message to the ErrorListener that the Request was
     * initialized with.
     *
     * @param error Error details
     */
    public void deliverError(VolleyError error) {
        if (mErrorListener != null) {
            mErrorListener.onErrorResponse(error);
        }
    }

    /**
     * Our comparator sorts from high to low priority, and secondarily by
     * sequence number to provide FIFO ordering.
     */
    @Override
    public int compareTo(Request<T> other) {
        Priority left = this.getPriority();
        Priority right = other.getPriority();

        // High-priority requests are "lesser" so they are sorted to the front.
        // Equal priorities are sorted by sequence number to provide FIFO ordering.
        return left == right ?
                this.mSequence - other.mSequence :
                right.ordinal() - left.ordinal();
    }

    @Override
    public String toString() {
        String trafficStatsTag = "0x" + Integer.toHexString(getTrafficStatsTag());
        return (mCanceled ? "[X] " : "[ ] ") + getUrl() + " " + trafficStatsTag + " "
                + getPriority() + " " + mSequence;
    }
}
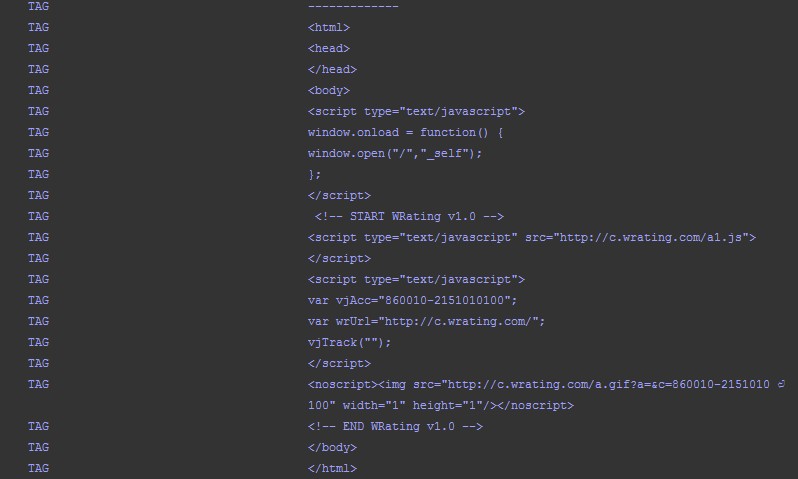
使用示例:
        StringRequest postStringRequest = new StringRequest(Method.POST, "http://m.weather.com.cn/data/101010100.html",
                new ResponseListener(), null);
        Map<String, String> map = new HashMap<String, String>();
        map.put("params1", "value1");
        map.put("params2", "value2");
        postStringRequest.setParams(map);
        mQueue.add(postStringRequest);
结果:
三、使用JsonObjectRequest接收Json类型的响应
类似于StringRequest,JsonRequest也是继承自Request类的,不过由于JsonRequest是一个抽象类,因此我们无法直接创建它的实例,那么只能从它的子类入手了。JsonRequest有两个直接的子类,JsonObjectRequest和JsonArrayRequest,从名字上你应该能就看出它们的区别了吧?一个是用于请求一段JSON数据的,一个是用于请求一段JSON数组的。
3.1 构造函数
    /**
     * Creates a new request.
     * @param method the HTTP method to use
     * @param url URL to fetch the JSON from
     * @param jsonRequest A {@link JSONObject} to post with the request. Null is allowed and
     *   indicates no parameters will be posted along with request.
     * @param listener Listener to receive the JSON response
     * @param errorListener Error listener, or null to ignore errors.
     */
    public JsonObjectRequest(int method, String url, JSONObject jsonRequest,
     Listener<JSONObject> listener, ErrorListener errorListener) {
        super(method, url, (jsonRequest == null) ? null : jsonRequest.toString(), listener,
                    errorListener);
    }

    /**
     * Constructor which defaults to <code>GET</code> if <code>jsonRequest</code> is
     * <code>null</code>, <code>POST</code> otherwise.
     *
     * @see #JsonObjectRequest(int, String, JSONObject, Listener, ErrorListener)
     */
    public JsonObjectRequest(String url, JSONObject jsonRequest, Listener<JSONObject> listener,
            ErrorListener errorListener) {
        this(jsonRequest == null ? Method.GET : Method.POST, url, jsonRequest,
                listener, errorListener);
    }
3.2 发送请求
和之前讲过的StringRequest一样,可以传入请求的类型,如果没传就默认是GET请求。参数也是如出一辙,就是泛型变了下。定义和使用的方式也完全一致,初始化对象后,添加到请求队列即可。
        JsonObjectRequest request = new JsonObjectRequest("http://m.weather.com.cn/data/101010100.html",
                null, new ResponseListener(), new ResponseErrorListener());
        mQueue.add(request);
    /**
     * @author:Jack Tony
     * @description :设置响应结果监听器,这里用的是JsonObjectRequest,所以返回的结果是JSONObject
     * @date :2015年1月24日
     */
    private class ResponseListener implements Response.Listener<JSONObject> {

        @Override
        public void onResponse(JSONObject response) {
            // TODO 自动生成的方法存根
            Log.d("TAG", "-------------\n" + response.toString());
        }

    }

    /**
     * @author:Jack Tony
     * @description :访问出错时触发的监听器
     * @date :2015年1月28日
     */
    private class ResponseErrorListener implements Response.ErrorListener {

        @Override
        public void onErrorResponse(VolleyError error) {
            Log.e("TAG", error.getMessage(), error);
        }
    }
结果:
你怎么查看解析是否成功了呢?服务器端的数据:
{"weatherinfo":{"city":"北京","city_en":"beijing","date_y":"2014年3月4日","date":"","week":"星期二","fchh":"11","cityid":"101010100","temp1":"8℃~-3℃","temp2":"8℃~-3℃","temp3":"7℃~-3℃","temp4":"8℃~-1℃","temp5":"10℃~1℃","temp6":"10℃~2℃","tempF1":"46.4℉~26.6℉","tempF2":"46.4℉~26.6℉","tempF3":"44.6℉~26.6℉","tempF4":"46.4℉~30.2℉","tempF5":"50℉~33.8℉","tempF6":"50℉~35.6℉","weather1":"晴","weather2":"晴","weather3":"晴","weather4":"晴转多云","weather5":"多云","weather6":"多云","img1":"0","img2":"99","img3":"0","img4":"99","img5":"0","img6":"99","img7":"0","img8":"1","img9":"1","img10":"99","img11":"1","img12":"99","img_single":"0","img_title1":"晴","img_title2":"晴","img_title3":"晴","img_title4":"晴","img_title5":"晴","img_title6":"晴","img_title7":"晴","img_title8":"多云","img_title9":"多云","img_title10":"多云","img_title11":"多云","img_title12":"多云","img_title_single":"晴","wind1":"北风4-5级转微风","wind2":"微风","wind3":"微风","wind4":"微风","wind5":"微风","wind6":"微风","fx1":"北风","fx2":"微风","fl1":"4-5级转小于3级","fl2":"小于3级","fl3":"小于3级","fl4":"小于3级","fl5":"小于3级","fl6":"小于3级","index":"寒冷","index_d":"天气寒冷,建议着厚羽绒服、毛皮大衣加厚毛衣等隆冬服装。年老体弱者尤其要注意保暖防冻。","index48":"冷","index48_d":"天气冷,建议着棉服、羽绒服、皮夹克加羊毛衫等冬季服装。年老体弱者宜着厚棉衣、冬大衣或厚羽绒服。","index_uv":"中等","index48_uv":"中等","index_xc":"较适宜","index_tr":"一般","index_co":"较舒适","st1":"7","st2":"-3","st3":"8","st4":"0","st5":"7","st6":"-1","index_cl":"较不宜","index_ls":"基本适宜","index_ag":"易发"}}
如果解析错误,就会出现警告,这时错误监听器就会被触发:
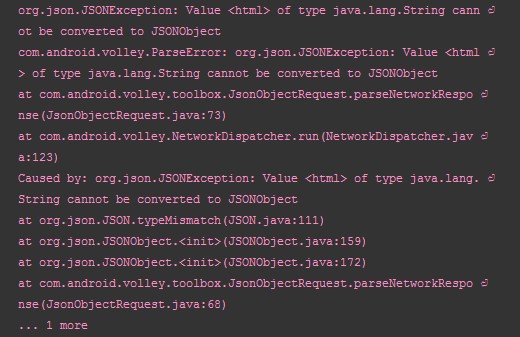
如果解析成功,就不会出现错误,这就是泛型的好处,保证了程序的正确性。
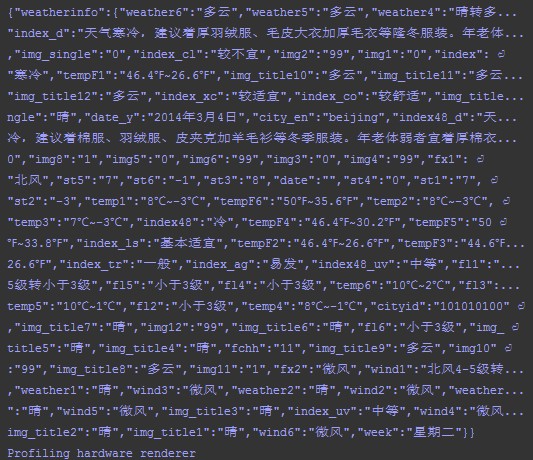
*终我们就可以在Response.Listener<JSONObject>中得到JSONObject对象,通过这个对象就能进行下一步的处理了。
3.3 解析Json
比如要解析出上面Json数据中city的字段,就可以按照如下方式编码:
     try {
                response = response.getJSONObject("weatherinfo");
                Log.i(TAG, "City = " + response.getString("city"));
            } catch (JSONException e) {
                // TODO 自动生成的 catch 块
                e.printStackTrace();
            }
完整监听器代码:
    private class ResponseListener implements Response.Listener<JSONObject> {

        @Override
        public void onResponse(JSONObject response) {
            // TODO 自动生成的方法存根
            Log.d("TAG", "-------------\n" + response.toString());

            try {
                response = response.getJSONObject("weatherinfo");
                Log.i(TAG, "City = " + response.getString("city"));
            } catch (JSONException e) {
                // TODO 自动生成的 catch 块
                e.printStackTrace();
            }
        }

    }
结果:

四、JsonArrayRequest简介
除此之外,还有一个相关的响应对象叫做JsonArrayRequest,这个获得的就是一个Json序列,使用方式没有任何改变,这里就不做过多介绍了,因为剩下的就是Json的知识了,和Volley没有任何关系。
源码:
/*
 * Copyright (C) 2011 The Android Open Source Project
 *
 * Licensed under the Apache License, Version 2.0 (the "License");
 * you may not use this file except in compliance with the License.
 * You may obtain a copy of the License at
 *
 *      http://www.apache.org/licenses/LICENSE-2.0
 *
 * Unless required by applicable law or agreed to in writing, software
 * distributed under the License is distributed on an "AS IS" BASIS,
 * WITHOUT WARRANTIES OR CONDITIONS OF ANY KIND, either express or implied.
 * See the License for the specific language governing permissions and
 * limitations under the License.
 */

package com.android.volley.toolbox;

import com.android.volley.NetworkResponse;
import com.android.volley.ParseError;
import com.android.volley.Response;
import com.android.volley.Response.ErrorListener;
import com.android.volley.Response.Listener;

import org.json.JSONArray;
import org.json.JSONException;

import java.io.UnsupportedEncodingException;

/**
 * A request for retrieving a {@link JSONArray} response body at a given URL.
 */
public class JsonArrayRequest extends JsonRequest<JSONArray> {

    /**
     * Creates a new request.
     * @param url URL to fetch the JSON from
     * @param listener Listener to receive the JSON response
     * @param errorListener Error listener, or null to ignore errors.
     */
    public JsonArrayRequest(String url, Listener<JSONArray> listener, ErrorListener errorListener) {
        super(Method.GET, url, null, listener, errorListener);
    }

    @Override
    protected Response<JSONArray> parseNetworkResponse(NetworkResponse response) {
        try {
            String jsonString =
                new String(response.data, HttpHeaderParser.parseCharset(response.headers));
            return Response.success(new JSONArray(jsonString),
                    HttpHeaderParser.parseCacheHeaders(response));
        } catch (UnsupportedEncodingException e) {
            return Response.error(new ParseError(e));
        } catch (JSONException je) {
            return Response.error(new ParseError(je));
        }
    }
}
通过源码我们知道,这个响应对象发送的请求是Get,而且它是继承自JsonRequest,如果你想用POST来做,自行添加新的构造函数即可。
四、请求取消
Activity里面启动了网络请求,而在这个网络请求还没返回结果的时候,Activity被结束了,此时如果继续使用其中的Context等,除了无辜的浪费CPU,电池,网络等资源,有可能还会导致程序crash,所以,我们需要处理这种一场情况。使用Volley的话,我们可以在Activity停止的时候,同时取消所有或部分未完成的网络请求。Volley里所有的请求结果会返回给主进程,如果在主进程里取消了某些请求,则这些请求将不会被返回给主线程。Volley支持多种request取消方式。
1)可以针对某些个request做取消操作:
@Override
   public void onStop() {
       for (Request <?> req : mRequestQueue) {
           req.cancel();
       }
   }
    @Override
    protected void onStop() {
        // TODO Auto-generated method stub
        super.onStop();
        mRequestQueue.cancelAll(this);
    }
3)可以根据RequestFilter或者Tag来终止某些请求
给请求设置标签:
如果你想取消所有的请求,在onStop方法中添加如下代码:
@Override
protected void onStop() {
    super.onStop();
    mRequestQueue.cancelAll(new RequestQueue.RequestFilter() {
        @Override
        public boolean apply(Request<?> request) {
            // do I have to cancel this?
            return true; // -> always yes
        }
    });
}
这样你就不必担心在onResponse被调用的时候用户已经销毁Activity。这种情况下会抛出NullPointerException 异。但是post请求则需要继续,即使用户已经改变了Activity。我们可以通过使用tag来做到,在构造GET请求的时候,添加一个tag给它。
// after declaring your request
request.setTag("My Tag");
mRequestQueue.add(request);
如果要取消所有指定标记My Tag的请求,只需简单的添加下面的一行代码:
mRequestQueue.cancelAll("My Tag");
这样你就只会取消My Tag请求,让其它请求不受影响。注意你必须手动在销毁的Activity中处理这种情况。
@Override
rotected void onStop() {
// TODO Auto-generated method stub
super.onStop();

mRequestQueue.cancelAll( new RequestFilter() {});
or
mRequestQueue.cancelAll(new Object());


 不同的声音从发布的*天起,AirPods Pro 就获得了用户的一致好评。在 AirPods Pro 之前,大部分蓝牙耳机都有着各种功能缺陷。比如不支持降噪、不够便携、佩戴舒适度不够、通话质量不好、不防水防汗……AirPods Pro 没有在某一方面做得特别*致,但它至少是功能*全面的耳机,能够应对*大多数需求场景。之前,苹果的耳机、以至于大部分音频产品都只能发出「一种标准声音」。但 AirPods Pro 则不一样,它具备「降噪」、「通透」两种声音模式,通过外置的麦克风聆听环境里的声音,满足用户不同场景下的需求。然而这还只是苹果在音频领域野心的*步。在 iOS 14 的软件更新里,苹果为 AirPods Pro 加入了模拟声场的功能。通过 AirPods Pro 的扬声器,苹果可以模拟出 5.1、7.1 环绕立体声的效果,甚至是杜比 Atmos 标准的声场效果。很多游戏耳机也有模拟多声道立体声的功能,但这些耳机全部都是头戴式耳机。想在入耳耳机里实现这个功能,在 AirPods Pro 之前还未有先例。不仅如此,因为内置了陀螺仪和加速传感器,AirPods Pro 能检测到用户头部的移动、旋转,可以依据偏转的角度自动校正声场分布的角度,让用户听到的声音一直处于正确的位置上。AirPods Pro 之前,苹果做耳机的方法论是相对简单的。从 2001 到 2019 年,苹果 18 年几乎只用了两套耳机模具。2001 年,苹果随初代 iPod 推出了经典的「小白」耳机,之后随 iPod、iPhone 附赠,一用就是 10 年,仅仅针对耳机柄和线控做了小的改动调整。直到 2012 年,苹果扫描了数百个用户的耳朵,以此为依据设计并推出了 EarPods 耳机,同样的设计也被用在了 AirPods 上。这些耳机提供的声音体验也是类似的。常年以来,苹果音频设备的声音一直被用户形容为「白开水」,没有过分的音色特征。苹果希望提供一种「标准化」的声音体验,让不同设备上的声音能保持连贯一致。
  一个 EarPods 的模具,苹果用了多年|Unsplash但*近几年,苹果音频产品的设计思路正发生着悄然变化。在 HomePod 上,苹果提出了「感知环境」并以此为依据定向优化声音的概念;从 iPhone XS 开始,苹果在 iPhone 上加入了更宽的立体声功能,仅通过双扬声器就能模拟出广阔的声场;在 MacBook Pro 上,苹果也开始通过内置的 T2 芯片管理音频回放,从 2018 年起,几乎每一次 MacBook Pro 更新,都伴随着扬声器、麦克风效果的提升。很明显,苹果的音频团队正在利用技术革新,提升旗下所有产品线的声音体验。其中*重要的提升点就是「更大、更准确的声场」和「分离度更好的三频」。现在,AirPods Pro 也将受益于这一成果。不仅如此,iOS 14 还将首次允许用户对耳机发出的声音进行个性化定制。苹果在新系统里内置了一套完整的流程,帮助用户在多种声音风格中,选出一个自己*喜欢的。这些不同的声音设置,能让一些特定的音乐风格更突出,也可以让用户在通话、听播客时,听到更清晰的人声。与此同时,这一套体验革新还并不止于设备层面。早在 2018 年,负责 Apple Music 等互联网内容业务的高级副总裁 Eddy Cue 就在接受采访时表示,Apple Music 会基于分析数据,针对不同的歌曲调整各自的 EQ(均衡器效果)设置,提升音乐的表现力。配合硬件,提升音乐的表现力。通过 AirPods Pro 的软件更新,加上旗下大量支持环绕立体声标准的内容库,苹果不再甘心于仅仅提供一种声音,而是要针对不同的场景,提供更好、更丰富的声音体验。
  可穿戴的传感器除了声音,苹果还在 AirPods Pro 里埋下了更多潜力。iOS 14 上,开发者将可以通过一个新的 API,调用 AirPods Pro 内置的运动传感器。借此实现一些游戏或运动功能,比如可以通过 AirPods Pro 中的传感器检测到用户做「波比跳」、深蹲等动作,或将用户头部的运动检测整合进游戏的玩法中。过去两年,可穿戴设备正在成为苹果新的增长「发动机」。从 2017 年第二季度开始,因为 AirPods 和 Apple Watch 的畅销,苹果的可穿戴设备业务一直保持着每年 30% 以上的高速增长。但苹果在可穿戴设备领域的布局*不仅仅是「卖手表和耳机」这么简单。在 AirPods 和 Apple Watch 受到用户亲睐之后,如何利用这些用户每天都贴身佩戴的产品,打造出独特的体验,才是苹果更大的长期目标。
  AirPods 已经成为全球*畅销的无线耳机|Unsplash早在 2017 年,AirPods 刚刚问世时,就有生物医学领域的专家 Steven LeBoeuf 向 CNBC 表示,AirPods 可能会是比 Apple Watch 更好的生物传感器。因为它戴在耳朵上,能够更好地感知到用户的体温、心跳等数据。与此同时,AirPods 针对听障人士的帮助也会成为非常重要的功能点。他准确预言了苹果的产品研发方向。之后,AirPods 的确可以配合 iPhone,为听障人士提供「助听」功能。iOS 14 上,这一系列功能继续进化,普通人现在也可以对 AirPods Pro 的降噪功能进行更多个性化设置,在「透明模式」下可以对周围环境声音的高低、大小进行分别设置,帮助用户过滤掉他们不想听到的声音。在无线耳机领域,苹果不是*早入局的一个。但 AirPods 迅速发展,恰好是苹果做产品时厚积薄发,后来居上的写照。仅仅三年,AirPods 从一幅简单的真无线耳机,成长为一幅能满足各种需求的降噪耳机。现在,它的蓝图已经延伸到更远的地方,即将进入一个从未被涉足的领域,再次实现颠覆。